Luongsontv: Xem Trực Tiếp Bóng Đá Lương Sơn TV, Link TTBD Miễn Phí


BÀI VIẾT MỚI NHẤT

Từ Thường Châu đến Ả Rập: U23 Việt Nam vươn tầm châu lục
Đặt U23 Việt Nam năm 2018 tại Thường Châu và U23 Việt Nam năm 2026 [...]
Th1

Zidane đồng ý dẫn dắt MU nếu đủ 2 điều kiện then chốt
Sau khi Manchester United chính thức sa thải HLV Ruben Amorim, làn sóng đồn đoán [...]
Th1

U23 Việt Nam tới Ả Rập Xê Út, lập tức bước vào buổi tập đầu tiên
Sáng ngày 2/1/2026 (giờ địa phương), đội tuyển U23 Việt Nam đã chính thức đặt [...]
Th1
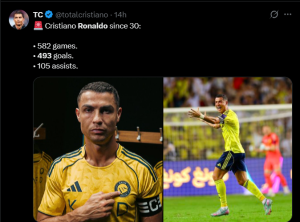
Ronaldo lập kỷ lục vô tiền khoáng hậu suốt 14 năm liên tiếp
Cristiano Ronaldo một lần nữa khiến thế giới bóng đá phải nhắc đến tên mình, [...]
Th12

Hoàng Đức nói gì sau lần thứ 3 giành Quả bóng Vàng Việt Nam?
Lễ trao giải Quả bóng Vàng Việt Nam 2025 đã khép lại, nhưng dư âm [...]
Th12

Neymar gửi lời hứa đặc biệt hướng tới World Cup 2026
World Cup 2026 vẫn còn hơn một năm nữa mới chính thức khởi tranh, nhưng [...]
Th12

Nhận định Al Nassr vs Al Zawraa: Màn so tài đỉnh cao bảng D
Vòng đấu cuối cùng bảng D AFC Champions League 2 chứng kiến cuộc đối đầu [...]
Th12

Bayern Munich gây sốc khi theo đuổi thủ lĩnh số một MU
Tương lai của Bruno Fernandes đang trở thành tâm điểm chú ý trên thị trường [...]
Th12
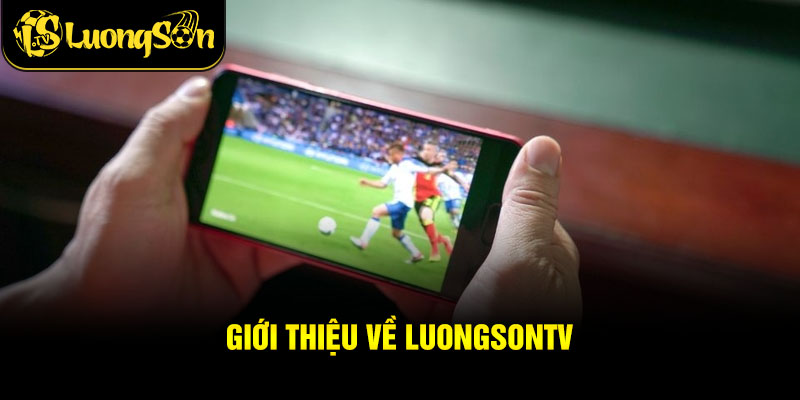
Luongsontv là website quen thuộc của người hâm mộ bóng đá khi cung cấp link trực tiếp bóng đá miễn phí, cập nhật nhanh và ổn định. Với chất lượng hình ảnh sắc nét, đường truyền mượt mà cùng lịch thi đấu đầy đủ từ các giải đấu hàng đầu thế giới, Luongsontv giúp người xem không bỏ lỡ bất kỳ khoảnh khắc kịch tính nào của các trận cầu đỉnh cao.
Mục Tiêu Phát Triển Của Trang Web Trực Tiếp Bóng Đá Luongsontv
Trong thời đại công nghệ số hiện nay, việc xem bóng đá trực tiếp qua điện thoại, máy tính, laptop đã trở nên phổ biến hơn bao giờ hết. Người hâm mộ không còn phụ thuộc vào TV truyền thống mà muốn theo dõi trận đấu mọi lúc, mọi nơi với chất lượng cao. Tuy nhiên, không phải trang web nào cũng đáp ứng được nhu cầu đó. Chính vì thế, Luongsontv ra đời với mục tiêu mang đến một địa chỉ xem bóng đá trực tuyến uy tín, miễn phí và chất lượng hàng đầu tại Việt Nam.
Link xem trực tiếp bóng đá: Luongsontv
Bình luận viên: Đội ngũ chuyên nghiệp, am hiểTin tức thể thao: Cập nhật liên tục 24/7
Xem lại video trận đấu: Highlight và video full chất lượng cao
Đứng sau Luongsontv là đội ngũ chuyên gia bóng đá và kỹ thuật viên IT hàng đầu, giúp nền tảng phát triển nhanh chóng, ứng dụng các công nghệ phát sóng tiên tiến để mang đến trải nghiệm mượt mà, hình ảnh sắc nét, âm thanh sống động.
Với phương châm “Lấy trải nghiệm người dùng làm trung tâm”, Luongsontv luôn nỗ lực cung cấp link xem trực tiếp ổn định cho tất cả các giải đấu lớn: Champions League, Ngoại Hạng Anh, Serie A, La Liga, Ligue 1, Bundesliga, Euro, World Cup, Copa America,… Tất cả các trận đều có độ phân giải cao, bình luận tiếng Việt hấp dẫn và đường truyền ổn định, giúp người xem tận hưởng trọn vẹn từng pha bóng.
Không chỉ phát sóng trực tiếp, Luongsontv còn là nơi cung cấp tin tức bóng đá, kết quả trận đấu, lịch thi đấu, bảng xếp hạng và kèo nhà cái được cập nhật liên tục và chính xác. Mục tiêu phát triển của Luongsontv là trở thành nền tảng xem bóng đá trực tuyến hàng đầu Việt Nam, nơi mọi người hâm mộ có thể cùng nhau hòa nhịp đam mê, thưởng thức trọn vẹn mọi trận cầu đỉnh cao.
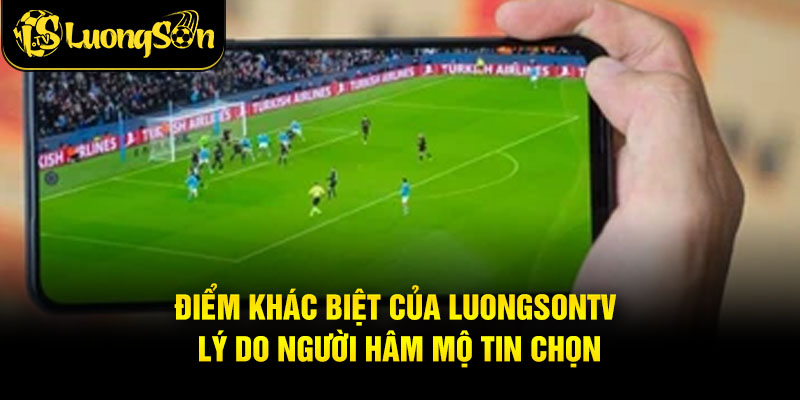
Điểm Khác Biệt Của LuongsonTV
Khác biệt nổi bật của LuongsonTV: không quảng cáo, phát sóng ổn định, giao diện thân thiện, nội dung đa dạng và tương tác cộng đồng sôi động. Trải nghiệm bóng đá trọn vẹn!
Trải Nghiệm Xem Bóng Đá Không Quảng Cáo
Luongsontv được xây dựng trên hệ thống máy chủ hiện đại và băng thông lớn, đảm bảo phát sóng ổn định, mượt mà ngay cả trong khung giờ cao điểm. Người xem có thể tận hưởng trọn vẹn từng pha bóng mà không bị làm gián đoạn bởi banner hay pop-up quảng cáo. Chính điều này giúp Luongsontv trở thành một trong số ít trang xem bóng đá trực tuyến miễn phí mang lại trải nghiệm sạch, nhanh và liền mạch, đúng với tiêu chí “xem bóng đá thật – không phiền nhiễu”.Chất Lượng Hình Ảnh Tối Ưu
Luongsontv mang đến cho người xem chất lượng hình ảnh vượt trội, với độ phân giải linh hoạt từ HD, Full HD đến 4K, tùy theo thiết bị và tốc độ mạng. Trang sử dụng công nghệ HDR tiên tiến, giúp màu sắc hiển thị chân thực, độ tương phản rõ ràng và khung hình mượt mà hơn bao giờ hết. Nhờ đó, mỗi trận đấu trên Luongsontv đều trở nên sống động, sắc nét và tràn đầy cảm xúc, mang đến trải nghiệm xem bóng đá trực tuyến gần như không khác gì truyền hình cao cấp.Bình Luận Viên Đa Phong Cách
Luongsontv quy tụ đội ngũ bình luận viên chuyên nghiệp và giàu kinh nghiệm, mang đến cho khán giả những phút giây giải trí sôi động trong từng trận đấu. Mỗi người sở hữu phong cách bình luận riêng – từ nghiêm túc, phân tích chuyên sâu cho đến dí dỏm, hài hước – giúp người xem tự do lựa chọn chất giọng và cảm xúc phù hợp với sở thích của mình. Nhờ sự linh hoạt này, mỗi trận đấu trên Luongsontv không chỉ là cuộc đối đầu trên sân cỏ mà còn là một bữa tiệc cảm xúc đầy màu sắc dành cho người hâm mộ bóng đá Việt Nam.Giao Diện Thân Thiện – Hỗ Trợ Đa Thiết Bị
Luongsontv được thiết kế với giao diện hiện đại, tối giản và dễ sử dụng, giúp người xem dễ dàng thao tác dù ở bất kỳ độ tuổi nào. Trang web tương thích hoàn hảo với mọi thiết bị — từ máy tính, laptop cho đến điện thoại thông minh và máy tính bảng. Nhờ khả năng tối ưu hiển thị, người dùng có thể tìm kiếm và truy cập trận đấu yêu thích chỉ với vài cú nhấp chuột, tận hưởng trải nghiệm xem bóng đá mượt mà, thuận tiện mọi lúc, mọi nơi.Hệ Sinh Thái Nội Dung Phong Phú
Luongsontv mang đến hệ sinh thái nội dung bóng đá toàn diện, nơi người hâm mộ có thể xem trực tiếp các trận đấu, theo dõi highlight, cập nhật tin tức nóng hổi, cùng bình luận chuyên sâu và giao lưu trong phòng chat cộng đồng. Tất cả được tích hợp trên một nền tảng duy nhất, mang đến trải nghiệm thể thao trọn vẹn, sinh động và kết nối cảm xúc cho mọi fan túc cầu Việt Nam.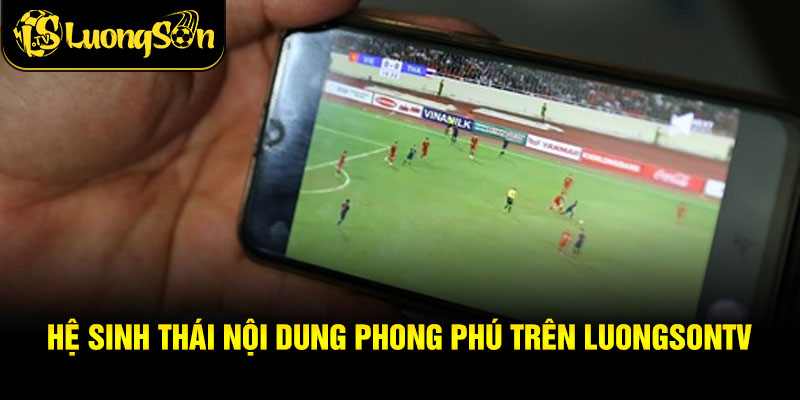
Thưởng Thức Mọi Trận Cầu Đỉnh Cao
Luongsontv mang đến cho người hâm mộ cơ hội xem trực tiếp bóng đá miễn phí với chất lượng hình ảnh Full HD và đường truyền ổn định, đảm bảo trải nghiệm mượt mà trên mọi thiết bị. Nền tảng phát sóng đầy đủ các giải đấu hàng đầu thế giới như Ngoại Hạng Anh, La Liga, Serie A, Bundesliga cùng nhiều giải hấp dẫn khác. Dù bạn ở đâu, chỉ cần truy cập Luongsontv, mọi trận cầu đỉnh cao đều nằm ngay trong tầm tay.Lịch Thi Đấu & Bảng Xếp Hạng Bóng Đá Mới Nhất
Lịch thi đấu và bảng xếp hạng là hai công cụ không thể thiếu đối với mọi người hâm mộ bóng đá. Tại Luongsontv, bạn có thể tra cứu lịch thi đấu theo ngày, giải đấu hoặc đội bóng yêu thích, giúp chủ động sắp xếp thời gian để không bỏ lỡ bất kỳ trận cầu nào.
Tính năng nổi bật của lịch thi đấu trên Luongsontv:
-
Lọc theo giải đấu: Champions League, Premier League, La Liga, Serie A, Bundesliga, V-League…
-
Lọc theo ngày hoặc khung giờ thi đấu, tùy theo lịch rảnh của bạn.
-
Tìm kiếm nhanh theo tên câu lạc bộ hoặc đội tuyển quốc gia.
-
Đồng bộ thời gian thực, tự động cập nhật khi có thay đổi lịch thi đấu.
Bên cạnh đó, bảng xếp hạng bóng đá trên Luongsontv được cập nhật liên tục 24/7, hiển thị chi tiết:
-
Số trận đã đấu, tổng điểm, hiệu số bàn thắng – bại.
-
Vị trí hiện tại và phong độ 5 trận gần nhất.
Nhờ giao diện trực quan, tối ưu trên cả điện thoại và máy tính, người hâm mộ có thể nắm bắt tình hình giải đấu nhanh chóng, chính xác và tiện lợi nhất. Luongsontv không chỉ là nơi xem bóng đá trực tiếp, mà còn là nguồn thông tin thể thao toàn diện, cập nhật từng phút từng giây.

Livescore
Livescore Luongsontv là lựa chọn hoàn hảo dành cho những ai bận rộn nhưng vẫn muốn theo dõi diễn biến từng phút, từng giây của trận đấu. Hệ thống được tích hợp công nghệ cập nhật thời gian thực, giúp bạn nắm bắt tỷ số, cầu thủ ghi bàn, kiến tạo, thẻ phạt, thay người và thời gian diễn ra từng tình huống ngay khi chúng xảy ra.
Với giao diện đơn giản, dễ sử dụng và tốc độ tải nhanh, Livescore của Luongsontv hoạt động ổn định trên cả máy tính, điện thoại và máy tính bảng, mang đến trải nghiệm theo dõi tiện lợi, không gián đoạn.
Bạn có thể nắm rõ mọi diễn biến trận đấu ngay cả khi đang làm việc hoặc di chuyển. Dù là Ngoại hạng Anh, Champions League, Serie A, hay V-League, Luongsontv luôn mang đến kết quả chính xác, cập nhật tức thời và hoàn toàn miễn phí — giúp bạn không bỏ lỡ bất kỳ khoảnh khắc nào trên sân cỏ.
Highlight
Phần Highlight trên Luongsontv không chỉ dừng lại ở việc tổng hợp những pha bóng đẹp mắt, mà còn mang đến góc nhìn chiến thuật và phân tích chuyên sâu. Mỗi video được biên tập ngắn gọn, cô đọng, tập trung vào những tình huống đáng chú ý nhất như bàn thắng, pha cứu thua xuất sắc, thẻ phạt hay các tình huống gây tranh cãi.
Điểm nổi bật của Highlight Luongsontv là phần bình luận và phân tích chuyên môn chi tiết, giúp người xem hiểu rõ hơn về chiến thuật, điểm mạnh – điểm yếu của từng đội, cũng như vai trò nổi bật của các cầu thủ chủ chốt. Đây chính là chuyên mục lý tưởng dành cho người hâm mộ muốn nhìn lại trận đấu một cách sâu sắc, vừa trọn vẹn cảm xúc, vừa giàu tính chiến lược và phân tích.
Tin Tức Bóng Đá Cập Nhật 24/7
Chuyên mục Tin Tức 24/7 trên Luongsontv mang đến cho người hâm mộ toàn cảnh thế giới bóng đá hiện đại với thông tin được cập nhật liên tục từng giờ. Không chỉ dừng lại ở chuyển nhượng đình đám, đội hình ra sân hay phong độ cầu thủ, chuyên mục còn khai thác góc nhìn hậu trường – từ chấn thương, án phạt đến những tuyên bố chiến thuật nóng bỏng của các huấn luyện viên hàng đầu.
Nội dung nổi bật:
-
Tin chuyển nhượng quốc tế và quốc nội
-
Cập nhật lực lượng, tình hình chấn thương mới nhất
-
Phân tích chiến thuật từ chuyên gia bóng đá uy tín
-
Phát biểu sau trận đấu từ cầu thủ và ban huấn luyện
-
Diễn biến nội bộ, mâu thuẫn hoặc scandal bên lề sân cỏ
Tất cả các bản tin trên Luongsontv đều được tổng hợp từ những nguồn tin đáng tin cậy như Sky Sports, BBC Sport, ESPN… và biên tập kỹ lưỡng để đảm bảo độ chính xác, tính thời sự và phù hợp với độc giả Việt Nam. Đây chính là nơi giúp bạn bắt kịp mọi chuyển động của bóng đá thế giới – nhanh, chuẩn và sâu sắc.
Hướng Dẫn Xem Bóng Đá Trên Luongsontv
Để tận hưởng những trận cầu đỉnh cao trên Luongsontv, bạn chỉ cần thực hiện 3 bước đơn giản sau:
🔹 Bước 1: Truy cập website chính thức của Luongsontv tại https://wwmag.net/ hoặc cài đặt ứng dụng Luongsontv trên thiết bị di động.
🔹 Bước 2: Tại trang chủ, chọn mục “Lịch thi đấu” hoặc “Trực tiếp bóng đá hôm nay” để tìm trận đấu bạn muốn xem — bao gồm cả những trận đang diễn ra và sắp khởi tranh.
🔹 Bước 3: Nhấn vào link xem trực tiếp và thưởng thức trận đấu. Người xem có thể tùy chỉnh độ phân giải hình ảnh theo tốc độ mạng để đảm bảo trải nghiệm mượt mà, không giật lag.
Chỉ với vài thao tác, bạn đã có thể xem bóng đá trực tuyến miễn phí, sắc nét và ổn định mọi lúc, mọi nơi cùng Luongsontv.
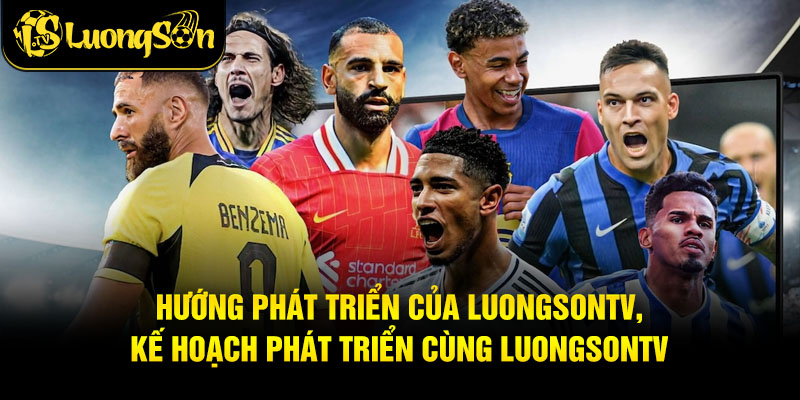
Hướng Phát Triển Của LuongsonTV
Luongsontv không ngừng đổi mới để bắt kịp xu hướng số hóa trong ngành thể thao hiện đại. Trong tương lai, nền tảng này sẽ không chỉ là trang phát sóng bóng đá trực tiếp miễn phí, mà còn hướng tới trở thành hệ sinh thái thể thao số toàn diện – nơi kết nối nội dung, công nghệ và cộng đồng người hâm mộ trên cùng một nền tảng.
Các định hướng phát triển nổi bật của Luongsontv:
-
Liên kết bản quyền truyền thông chính thống:
Luongsontv đang mở rộng hợp tác với các đối tác truyền hình và đơn vị truyền thông uy tín, nhằm đảm bảo nội dung hợp pháp, hình ảnh chất lượng cao và củng cố uy tín thương hiệu trên thị trường. -
Ứng dụng công nghệ AI cá nhân hóa nội dung:
Nền tảng sẽ tích hợp trí tuệ nhân tạo (AI) để đề xuất các trận đấu, bản tin và video highlight phù hợp với sở thích từng người dùng, mang đến trải nghiệm xem thông minh và cá nhân hóa hơn. -
Tích hợp công nghệ thực tế ảo (VR):
Hướng tới việc mô phỏng không gian sân vận động sống động như thật, giúp người xem trải nghiệm cảm giác nhập vai như đang ngồi giữa khán đài cổ vũ đội bóng yêu thích. -
Phát triển cộng đồng fan và tương tác:
Xây dựng diễn đàn, phòng chat và sự kiện online, tạo nơi giao lưu cho người hâm mộ, chia sẻ cảm xúc và kết nối cùng Luongsontv trong mọi trận đấu. -
Chuyên mục soi kèo – dự đoán tỷ số bằng dữ liệu:
Kết hợp phân tích thống kê phong độ, lịch sử đối đầu cùng AI dự đoán kết quả, mang lại trải nghiệm soi kèo có chiều sâu, chính xác và giải trí cao.
Với những định hướng này, Luongsontv đặt mục tiêu trở thành nền tảng thể thao trực tuyến hàng đầu Việt Nam, không chỉ phục vụ nhu cầu xem bóng đá mà còn định hình xu hướng thưởng thức thể thao trong kỷ nguyên số.
Câu Hỏi Thường Gặp (FAQ)
1. Xem bóng đá trực tiếp trên Luongsontv có mất phí không?
Không. Toàn bộ nội dung trên Luongsontv đều được cung cấp hoàn toàn miễn phí. Người xem không cần phải thanh toán, đăng ký tài khoản, hay trả bất kỳ khoản phí ẩn nào để theo dõi các trận đấu. Chỉ cần truy cập website là bạn có thể tận hưởng những trận cầu hấp dẫn ngay lập tức.
2. Tôi có cần đăng nhập để sử dụng các tính năng như lịch thi đấu hay livescore không?
Không cần. Luongsontv mở toàn quyền truy cập cho tất cả người dùng. Bạn có thể xem lịch thi đấu, bảng xếp hạng, livescore (tỷ số trực tiếp) và các thông tin thống kê khác mà không cần tạo tài khoản hay đăng nhập hệ thống.
3. Luongsontv phát sóng những giải đấu nào?
Website cung cấp đầy đủ các giải đấu bóng đá hàng đầu trong nước và quốc tế, bao gồm:
-
Ngoại hạng Anh (Premier League)
-
La Liga (Tây Ban Nha)
-
Serie A (Ý)
-
Bundesliga (Đức)
-
Ligue 1 (Pháp)
-
Champions League, Europa League
-
V-League và các giải châu Á khác
Ngoài ra, Luongsontv còn thường xuyên cập nhật những giải đấu giao hữu, cúp quốc gia và các trận cầu nổi bật được người hâm mộ quan tâm.
4. Tốc độ cập nhật tỷ số trực tiếp có nhanh không?
Rất nhanh. Hệ thống livescore của Luongsontv được đồng bộ theo thời gian thực (real-time), cập nhật từng giây với đầy đủ thông tin về bàn thắng, thẻ vàng, thẻ đỏ, thay người và diễn biến quan trọng trong trận đấu. Điều này giúp người xem không bỏ lỡ bất kỳ khoảnh khắc nào dù không xem trực tiếp.
5. Tôi có thể xem Luongsontv trên điện thoại được không?
Có thể hoàn toàn. Giao diện của Luongsontv được thiết kế tối ưu cho mọi loại thiết bị — từ điện thoại di động, máy tính bảng đến máy tính để bàn. Dù bạn truy cập bằng trình duyệt nào, trải nghiệm xem vẫn mượt mà, rõ nét và ổn định.
6. Luongsontv có đăng tải highlight sau khi trận đấu kết thúc không?
Có. Sau mỗi trận đấu, Luongsontv sẽ nhanh chóng cập nhật video highlight, bản tóm tắt trận đấu và phân tích chuyên sâu giúp người xem có thể nắm bắt diễn biến chính, dù bỏ lỡ trực tiếp.
7. Luongsontv có kế hoạch phát triển gì trong thời gian tới?
Trong tương lai gần, Luongsontv hướng đến việc mở rộng các chuyên mục thể thao như:
-
Soi kèo – dự đoán kết quả cho từng trận đấu.
-
Phân tích dữ liệu bằng trí tuệ nhân tạo (AI) để đưa ra nhận định chính xác hơn.
-
Ứng dụng công nghệ thực tế ảo (VR) giúp người xem có trải nghiệm sống động như đang ở trên khán đài.
Kết Luận
Với chất lượng Full HD, tốc độ mượt mà, không quảng cáo và hoàn toàn miễn phí, LuongsonTV mang đến trải nghiệm xem bóng đá trực tiếp trọn vẹn và hiện đại nhất. Đây chính là điểm đến lý tưởng cho người hâm mộ muốn tận hưởng mọi trận cầu đỉnh cao mỗi ngày. Truy cập ngay LuongsonTV để hòa mình vào bầu không khí sôi động của môn thể thao vua!